
Introduction
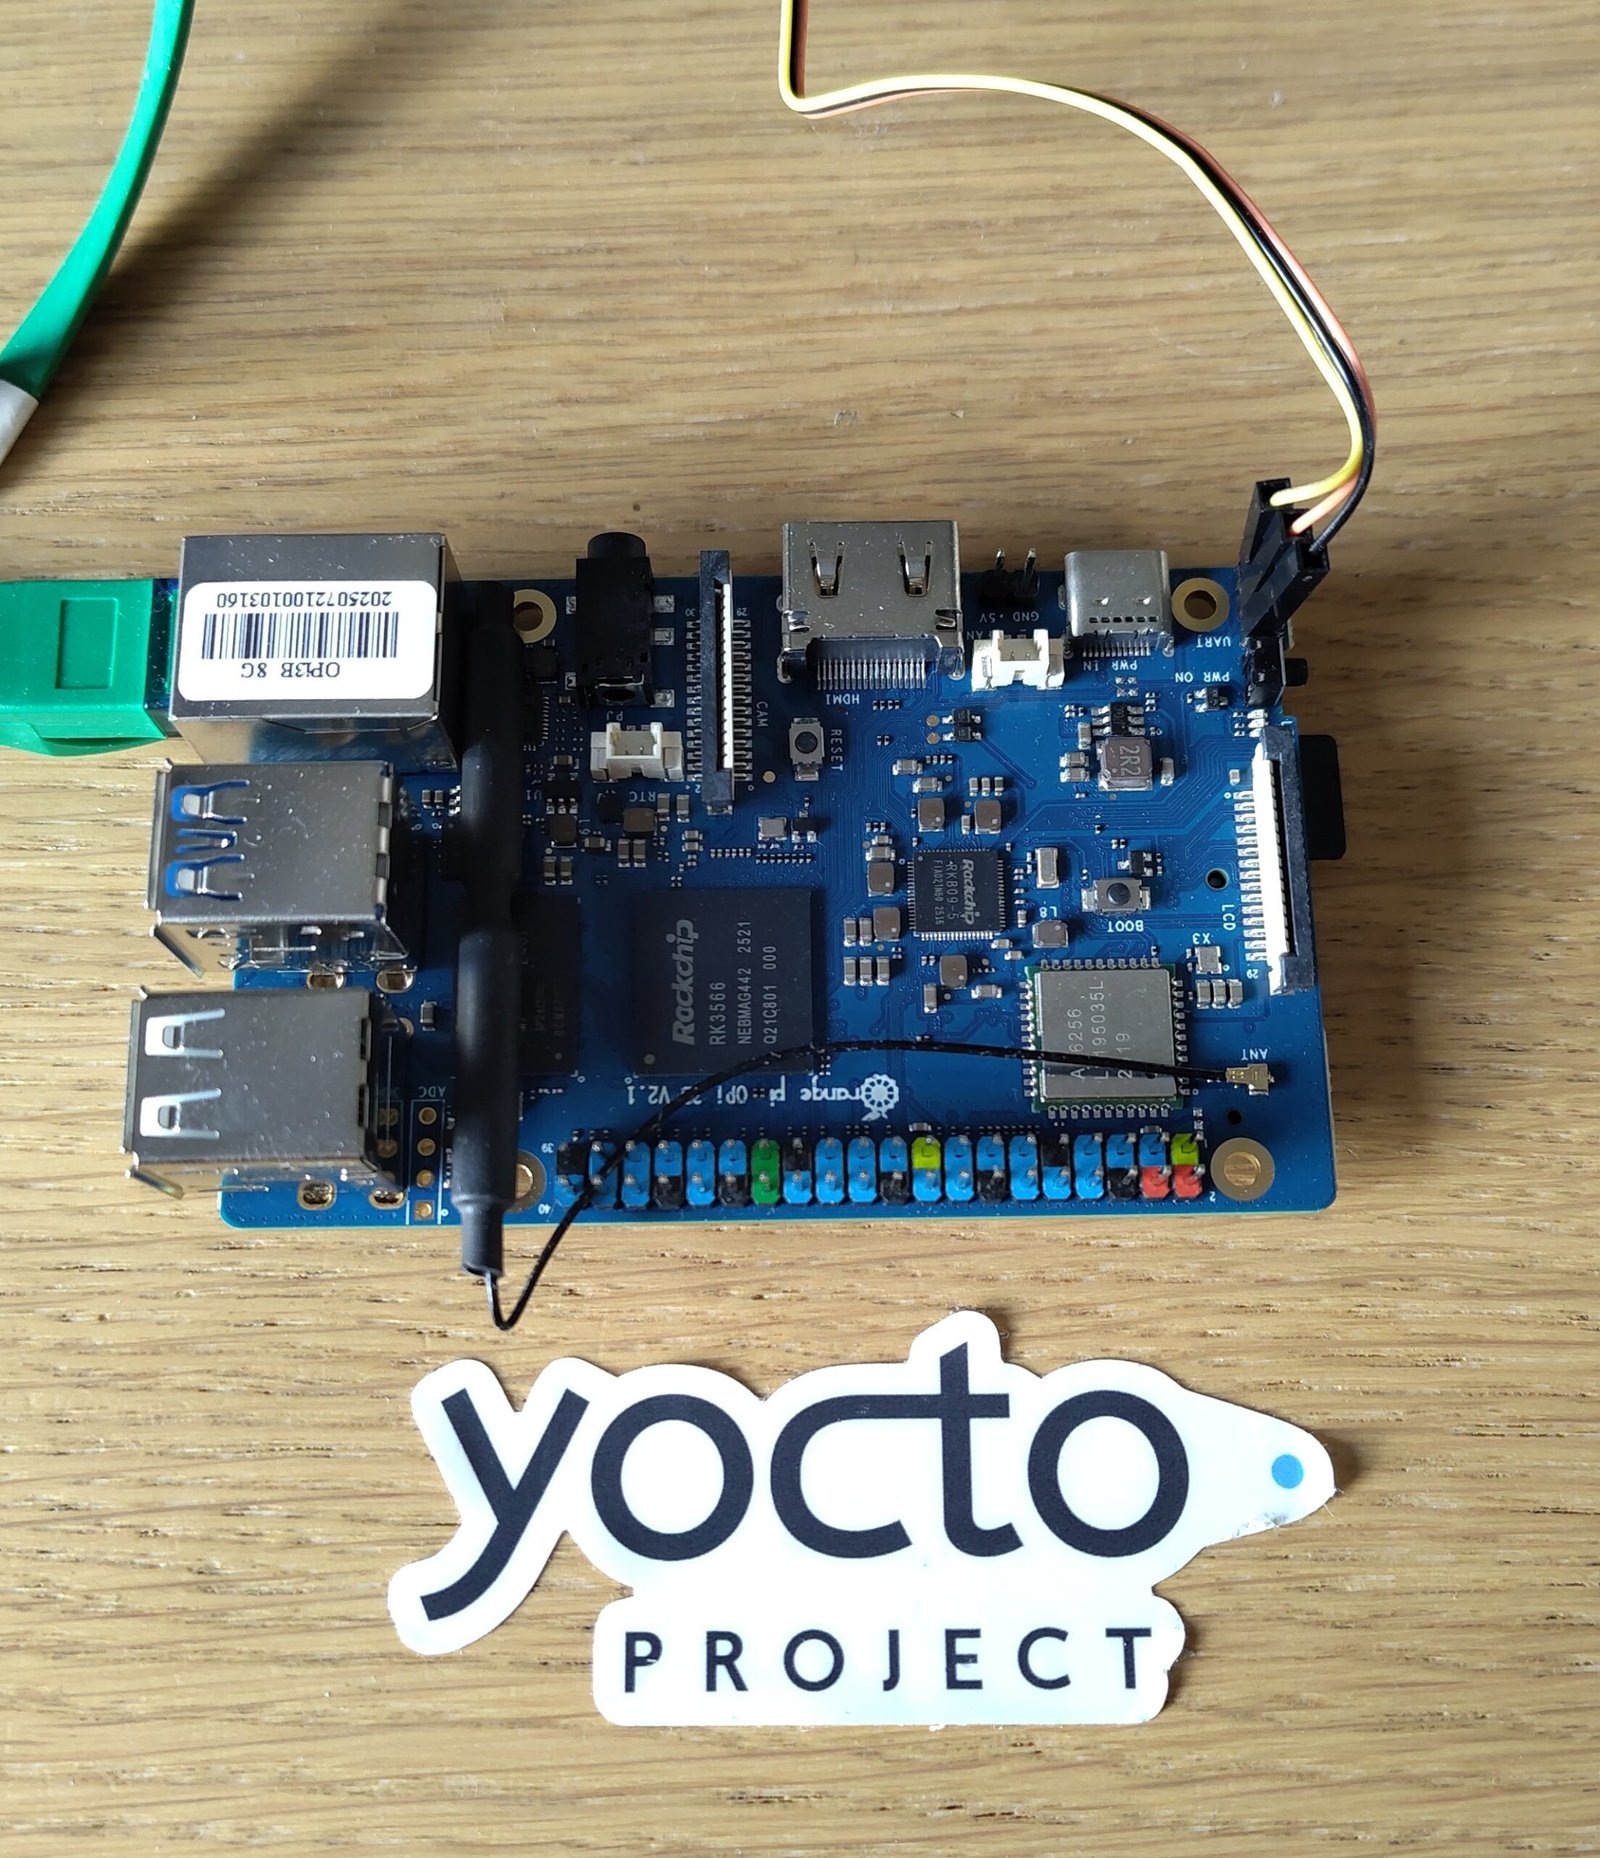
Orange PI 3B is a cheap and attractive Raspberry Pi sized single board computer based on the Rockchip RK3566:
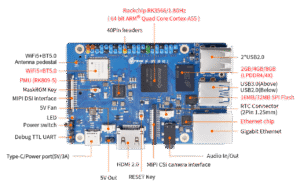
- Rockchip RK3566 (4x ARM Cortex-A55 @ 1.6GHz)
- ARM Mali-G52-2EE GPU (OpenGL ES 1.1/2.0/3.0/3.1/3.2, Vulkan 1.1, OpenCL 2.0)
- LPDDR4 RAM (2/4/8 GB)
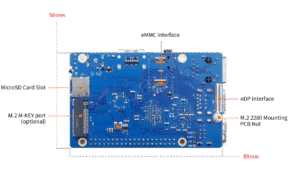
- Micro-SD card slot
- SPI flash (16/32 MB)
- Optional eMMC pluggable module (16/32/64/128/256 GB)
- Wi-Fi5 + Bluetooth 5.0, BLE
- 1x USB 2.0 Type A OTG, 2x USB 2.0 Type A HOST, 1x USB 3.0 Type A Host
- 1x HDMI (up to 4K @ 60fps)
- 1x MIPI DSI LCD port
- 1x MIPI CSI camera port
- Colour-coded 40-pin GPIO (uart, spi, i2c, pwm, gpio)
- Gigabit Ethernet port
- Optional M.2 M-KEY PCIe port
- 89 x 56 mm
The versions with 2 GB / 4 GB / 8 GB of RAM are currently sold at 38 / 44 and 66 EUR on the manufacturer’s AliExpress store. For the same amount of RAM, the price is much lower than Raspberry Pi 5 (currently 98 EUR with 8 GB of RAM), and you can use PCI Express without an additional board. This being said, Raspberry Pi 5 has its own strengths, such as dual 4K HDMI output.
Building custom embedded Linux images with Yocto
Thanks to a contribution from Jonas Karlman, this board is supported in the mainline Linux kernel since version 6.11 (July 2024). It was then also supported in U-Boot thanks to another contribution from Ricardo Pardini and Jonas Karlman.
Once everything was in place, it was then high time to support this board in Yocto. The main advantage of a build system like Yocto is that it takes care of building the SoC specific firmware and boot partitions, allowing you to focus on further kernel or bootloader development, or on the “interesting” parts of the system.
I sent a patch last week and it is now part of the master branch of the meta-rockchip community layer (see the commit).
You can then pick up this Kas file and build an image for your board:
header:
  version: 14

machine: orangepi-3b
distro: poky
target: core-image-base

repos:
  bitbake:
    url: https://git.openembedded.org/bitbake
    branch: master
    layers:
      bitbake: disabled

  meta-yocto:
    url: https://git.yoctoproject.org/meta-yocto
    branch: master
    layers:
      meta-poky:

  openembedded-core:
     url: https://git.openembedded.org/openembedded-core
     branch: master
     layers:
       meta:

  meta-openembedded:
    url: https://github.com/openembedded/meta-openembedded.git
    branch: master
    layers:
      meta-oe:
      meta-networking:
      meta-python:

  meta-rockchip:
    url: https://git.yoctoproject.org/meta-rockchip
    branch: master

  meta-arm:
    url: https://git.yoctoproject.org/meta-arm
    branch: master
    layers:
      meta-arm:
      meta-arm-toolchain:

local_conf_header:
  orangepi3b: |
    EXTRA_IMAGE_FEATURES = "empty-root-password allow-empty-password allow-root-login"
    KERNEL_DANGLING_FEATURES_WARN_ONLY = "1"
    INIT_MANAGER = "systemd"
    IMAGE_INSTALL:append = " i2c-tools ethtool iperf3 pciutils "
    IMAGE_ROOTFS_EXTRA_SPACE = "1048576"
Assuming you called it orangepi-3b.yml, you can then build your image with Kas:
$ kas build orangepi-3b.yml
You can also fetch the orangepi-3b.yml file from our Demos git repository:
$ git clone https://gitlab.com/rootcommit/demos.git
$ cd demos
$ git checkout 02444dfdc8b7fd786996d77e4296412bf166740f
$ cd ..
$ kas build demos/kas/orangepi-3b.yml
You can then flash the image on a micro-SD card with bmaptool (assuming your PC accesses it through /dev/sdc):
$ sudo umount /dev/sdc?
$ sudo bmaptool copy build/tmp/deploy/images/orangepi-3b/core-image-base-orangepi-3b.rootfs.wic /dev/sdc
Booting the board
If you bought your board recently, you’ll need to know a little trick to boot your board.
The boards that you buy from the manufacturer actually have their SPI flash loaded with bootloader and firmware (based on U-Boot 2017 😱), that is incompatible with the SD card image built with Yocto. The problem is that the Rockchip 3566 SoC will try to boot on such storage first.
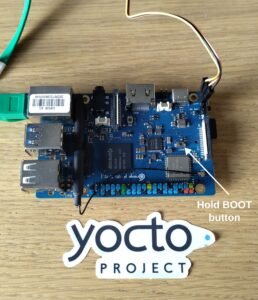
Fortunately, you can hold the BOOT button at power-on or reset time to ignore SPI flash and directly boot off the micro-SD card slot.
Another possibility is to erase the SPI flash later from Linux, using the flash_eraseall command.
Then connect a serial dongle (such as the Raspberry Pi Debug Probe) to the Debug TTL UART pins and start your favorite terminal emulator, which in my case is tio:
$ tio -b 1500000 /dev/ttyACM0
....

That’s all for now. Later, I will add what’s need to make Wifi and Bluetooth work on this board.
Do it your self on your own boards
To learn how to implement all this on your own boards, check out our Yocto and OpenEmbedded and Embedded Linux training courses.