

The Radxa Dragon Q6A is a credit card-sized single-board computer built around Qualcomm’s QCS6490 — the same silicon family found in the Fairphone 5 and Qualcomm’s own RB3gen2 reference platform. It packs an octa-core Kryo 670 CPU, an Adreno 643 GPU, and a 12 TOPS Hexagon NPU into a board with Gigabit Ethernet, WiFi 6, HDMI, triple camera connectors, and an M.2 NVMe slot. Starting at around $60, it sits in an interesting spot — significantly more compute per dollar than a Raspberry Pi 5, with a genuine ML inference pipeline that doesn’t require an external accelerator. Qualcomm provides Yocto builds for RB3Gen2 boards and Radxa mentions this in their documentation but doesn’t provide any how-to. In this article, we shall explore the steps taken to get Yocto running with Mainline Linux Kernel.
Boot Architecture
The Dragon Q6A boots differently from most SBCs. The boot firmware lives on a separate 32 MiB SPI NOR flash chip, independent from your OS storage — similar to a PC’s BIOS chip. Qualcomm’s boot chain starts with PBL in ROM, hands off to XBL in SPI NOR, which loads TrustZone and a full UEFI implementation based on EDK2. From there it follows the standard UEFI path — the firmware scans your SD card, NVMe, or UFS for an EFI System Partition, finds systemd-boot, which loads a UKI (Unified Kernel Image bundling the kernel, initramfs, and command line into a single PE binary), and boots Linux. This split means your Yocto build only produces a standard GPT disk image — an ESP and a rootfs. The SPI NOR firmware is flashed separately using Radxa’s edl-ng tool, typically just once. One thing worth knowing: the UEFI firmware applies board-specific patches to the device tree in memory before passing it to Linux, so the running device tree can differ from what’s compiled in the kernel source. This is normal for Qualcomm platforms and something to keep in mind when debugging peripheral bring-up.
┌─────────────────────────────────────────────────────────┐
│                      ROM/SPI NOR (32 MiB)               │
│                                                         │
│  ┌───────┐    ┌───────┐    ┌──────┐    ┌────────────┐   │
│  │  PBL  │───►│  XBL  │───►│  TZ  │───►│ UEFI/EDK2  │   │
│  │ (ROM) │    │       │    │ HYP  │    │            │   │
│  └───────┘    └───────┘    └──────┘    └─────┬──────┘   │
│                                              │          │
└──────────────────────────────────────────────┼──────────┘
                                               │
                              Scans for ESP    │
                              (GPT GUID)       │
                                               ▼
┌─────────────────────────────────────────────────────────┐
│                 SD Card / NVMe / UFS                    │
│                                                         │
│  ┌──────────────────────┐  ┌─────────────────────────┐  │
│  │   ESP (FAT, ~50 MB)  │  │   rootfs (ext4, ~1.2 GB)│  │
│  │                      │  │                         │  │
│  │  ┌────────────────┐  │  │  /lib/firmware/         │  │
│  │  │ systemd-boot   │  │  │  /usr/                  │  │
│  │  │ (BOOTAA64.EFI) │  │  │  /etc/                  │  │
│  │  └───────┬────────┘  │  │  ...                    │  │
│  │          │           │  │                         │  │
│  │          ▼           │  │                         │  │
│  │  ┌────────────────┐  │  │                         │  │
│  │  │      UKI       │  │  │                         │  │
│  │  │ (kernel +      │  │  │                         │  │
│  │  │  initramfs +   │──┼──┼──► mounts /             │  │
│  │  │  cmdline)      │  │  │                         │  │
│  │  └────────────────┘  │  │                         │  │
│  └──────────────────────┘  └─────────────────────────┘  │
│                                                         │
└─────────────────────────────────────────────────────────┘
Setup
The board chosen for the build has 8GB of RAM. To access BIOS/UEFI, a USB-UART serial cable is used. The hardware connections are described in the Radxa documentation, it is similar to RPi as the board is of similar form-factor. Once this setup is done, the board can be powered up using a USB-C cable.
BIOS and Vendor Images
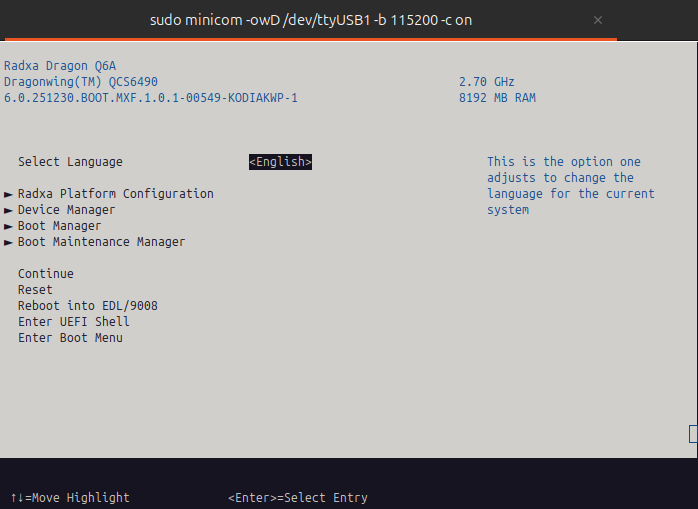
The board boots up and presents a BIOS menu. More details on this can be found in the official docs. The initial way to test the board is by flashing an SD card with a vendor specific image. These images can be downloaded from the same documentation center. It can be quite useful to have these images when bringing up the board using Yocto. For example, a config may be not applied or the device tree may be incorrectly specified. In these cases, it may be useful to compare the diffs and apply the patches where necessary.
Building with Yocto
As per the latest Qualcomm Linux Build Guide, the configuration to build for our board/machine is missing. Luckily, the SoC on some of the Qualcomm boards like RB3 Gen2 is the same, so we could leverage this to build our own machine configuration.
Getting the sources
Prerequisites
Before setting up the project, we will need to follow Yocto’s official guide to install necessary packages. Along with it, kas needs to be installed. Kas is a tool that uses a YAML manifest to pull in the layers as well as to set up the build configuration.
FIRST BUILD
Download/Clone the repository code from Gitlab. It is required to update the submodule inside.
git clone https://gitlab.com/opensource-navin/qualcomm.git
cd qualcomm
git submodule update --init --recursive
Once the sources are downloaded, we can use kas to trigger the first build:
kas build meta-radxa-bsp/ci/radxa-dragon-q6a-with-lock.yml:meta-radxa-bsp/ci/minimal-image.ymlHere two YAML files are included ad-hoc. The first one lists the meta layers needed to build and the second one targets the image type. We use qcom-minimal-image as the target type for a quick and lean build.
The kas shell command can also be invoked, as explained in the README file in the main repository.
Flashing to SD CARD
Once the build has been successfully completed, the image is generated under the build/tmp/deploy/images/<machine> directory. Grab an SD card and flash it using the following commands. Please note that the SD Card can be shown as/dev/mmblk or/dev/sdb or something else.
sudo umount /dev/mmcblk0? # If mounted, then unmount the SD CardThe image can then be copied using bmaptool:
sudo bmaptool copy \
build/tmp/deploy/images/radxa-dragon-q6a/qcom-minimal-image-radxa-dragon-q6a.rootfs.wic.gz \
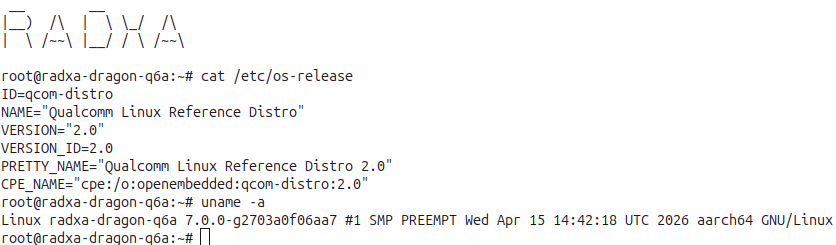
/dev/mmcblk0After copying, unmount the SD card and insert it to the board and power up! In the serial console we should see the following.
Welcome to Qualcomm Linux Reference Distro 2.0!
[    8.235608] systemd[1]: Initializing machine ID from random generator.
[    8.254678] systemd[1]: Installed transient '/etc/machine-id' file.
[    8.281905] systemd[1]: Hostname set to <radxa-dragon-q6a>.
.
# A few moments later
.
Qualcomm Linux Reference Distro 2.0 radxa-dragon-q6a ttyMSM0
radxa-dragon-q6a login: root
Password: <root>
 __        __
|__)  /\  |  \ \_/  /\
|  \ /~~\ |__/ / \ /~~\
root@radxa-dragon-q6a:~#
And just like that we have our minimal image running. As a side note, source bash (type bash) to get rid of the long command line prompt. The username and password is set to root. This is not very secure, but we are just testing!
Accessing console over ethernet
The console can be reached over ssh as well. The board needs to be connected to the same local network as the Host PC. Thanks to mDNS already provided in the image, we do not have to struggle to find the IP address of the board.
ssh root@radxa-dragon-q6a.localWhen prompted, enter root as the password.
Yocto Development
How did we create a machine configuration for this board? meta-qcom provides most of the setup required for this build, yet we need additional configuration to support our board. Thanks to the Linux Kernel community, the DTS for this board is upstreamed as of the 6.19 kernel. We can utilize this device tree to make our own machine config.
Machine Conf
A BSP meta layer that provides machine configurations has the files stored in the path meta-bsp/conf/machine/<machine>.conf. If we take a look at the machine configuration directory in the meta-qcom layer, we can see that there are several boards and SoC’s supported. Using this as reference, we create our own Yocto layer. The layer is named as meta-radxa-bsp.
For our board, we have the DTS under the boot/dts directory of the mainline kernel source tree.
KERNEL_DEVICETREE = "qcom/qcs6490-radxa-dragon-q6a.dtb"This is all that is needed to support the board!
Furthermore, the image needs to be flashable to SD card and needs to be in a format that UEFI can read.
EFI_PROVIDER = "systemd-boot"
WKS_FILE = "efi-uki-bootdisk.wks.in"
IMAGE_FSTYPES += "wic wic.gz wic.bmap ext4"
Conveniently, Yocto already provides a WIC configuration file and classes to make this happen. The other configurations are explained in the comments provided in the code.
bootloader --ptable gpt
part /boot --source rootfs --rootfs-dir=${IMAGE_ROOTFS}/boot --fstype=vfat --label boot --active --align 1024 --use-uuid --overhead-factor 1.2
part / --source rootfs --fstype=ext4 --label root --align 1024 --exclude-path boot/
The WIC kickstart file is a blueprint that tells Yocto how to partition the final disk image. It creates a GPT partition table with two partitions. The first is a small FAT partition labeled boot containing the EFI bootloader and kernel — FAT is required because the UEFI firmware can only read this format. The second is an ext4 partition labeled root holding the rest of the operating system. When Yocto builds the image, it takes the complete rootfs it assembled, puts everything under /boot into the first partition, and everything else into the second one. The result is a ready-to-flash disk image that you write directly to an SD card or NVMe drive — no manual partitioning needed.
We can inspect the partitions created using the wic command. The wic command should be invoked after sourcing the environment using kas shell.
wic ls tmp/deploy/images/radxa-dragon-q6a/qcom-minimal-image-radxa-dragon-q6a.rootfs.wic
Num     Start        End          Size      Fstype
 1       1048576     60380159     59331584  fat16
 2      60817408   1391250431   1330433024  ext4
The parameters specified in the IMAGE_FSTYPES are used to create a wic image and bmap file.
Mainline Kernel
The default kernel version provided in meta-qcom is 6.18 at the time of this writing. But there exists a linux-qcom-next recipe which provides a 6.19 version. The most recent version is 7.0, why not upgrade? Recipetool may be used to create an append file for the kernel recipe.
recipetool newappend ../meta-radxa-bsp linux-qcom-nextThis generates a bbappend file that we can use to extend the recipe provided by meta-qcom. The contents of the file are shown below.
FILESEXTRAPATHS:prepend := "${THISDIR}/${PN}:"
SRC_URI += "file://realtek-eth-8169.cfg"

LINUX_VERSION = "7.0.0"
SRCREV = "2703a0f06aa75ff87793a53d549dbb15432b6758"

KBUILD_CONFIG_EXTRA:remove:aarch64 = " ${S}/arch/arm64/configs/prune.config"
KBUILD_CONFIG_EXTRA:remove:aarch64 = " ${S}/arch/arm64/configs/qcom.config"
In this recipe append file, we override the source revision and version. Some config files need to be removed as they are not present in the latest kernel source tree. Notice that we need to append a config fragment? This configuration is needed to enable Ethernet on the board. Since Ethernet on the board is connected to a PCIe port on the SoC, it will be discovered automatically. How to create a config fragment?
bitbake -c menuconfig virtual/kernel
bitbake -c diffconfig virtual/kernel
The first command shows a kernel menuconfig internface. Use the slash character (/) to search and type in CONFIG_R8169. It can be seen that this is disabled: CONFIG_R8169=n. I have chosen to make it built into the kernel (CONFIG_R8169=y) as opposed to making it a kernel module. Save the configuration and exit the menuconfig interface. Execute the second command to get the fragment.
NOTE: No setscene tasks
NOTE: Executing Tasks
Config fragment has been dumped into:
 /home/navin/Playground/qualcomm/build/tmp/work/radxa_dragon_q6a-qcom-linux/linux-qcom-next/7.0.0+git/fragment.cfg
NOTE: Tasks Summary: Attempted 1 tasks of which 0 didn't need to be rerun and all succeeded.
This fragment has to copied to the meta-radxa-bsp layer. The tree command shows where it is copied to.
meta-radxa-bsp
├── ci
├── conf
│   ├── layer.conf
│   └── machine
│       └── radxa-dragon-q6a.conf
├── recipes-kernel
│   └── linux
│       ├── linux-qcom-next
│       │   └── realtek-eth-8169.cfg
│       └── linux-qcom-next_git.bbappend
And that is all you need to build the mainline Linux kernel. Note that here the source tree is provided by the qualcomm-linux repository.
Image settings
Although the image features has properties to allow for an empty password, some other module overrides these.
IMAGE_FEATURES=" allow-empty-password empty-root-password allow-root-login"Therefore, we need to set a password. We use the openssl command to set the password and use it as follows. The image recipe needs to be appended the same way we did it for the kernel. The recipe used here is qcom-minimal-image.
#> printf "%q\r\n" $(openssl passwd -5  root)
#\$5\$nhf/qZLHxDT2OBqH\$XzIw7p8G2q61KtEqnsuRIEg2wX4Syem1dE30CCqpJX3
PASSWD = "\$5\$nhf/qZLHxDT2OBqH\$XzIw7p8G2q61KtEqnsuRIEg2wX4Syem1dE30CCqpJX3"
EXTRA_USERS_PARAMS = "\
    usermod -p '${PASSWD}' root; \
"
We set root as password for user root.
We can install some packages we need in this image. Dropbear is used as an SSH server and we need to include systemd-networkd so that DHCP works automatically. And also, there is my favorite tool btop, to stress test the CPU.
IMAGE_INSTALL:append = " dropbear \
                         openssh-sftp-server \
			 systemd-networkd \
		         btop \
"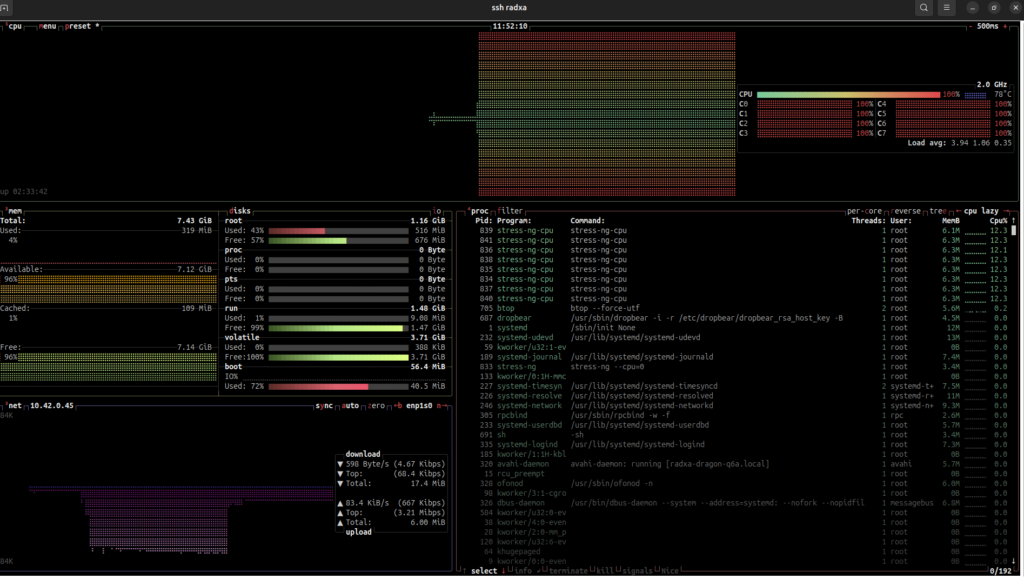
btopNPU Fixes
This board has a powerful 12 TOPS NPU. It did not work straight out of the box due to the firmware binaries not being present in the path that is expected. We use the radxa-dragon-q6a-firmware-symlinks.bb recipe to fix that. Once this is done, we can verify that the NPU works fine using the following commands.
root@radxa-dragon-q6a:~# cat /sys/class/remoteproc/remoteproc0/firmware
qcom/qcs6490/radxa/dragon-q6a/adsp.mbn
root@radxa-dragon-q6a:~# cat /sys/class/remoteproc/remoteproc1/firmware
qcom/qcs6490/radxa/dragon-q6a/cdsp.mbn
root@radxa-dragon-q6a:~# cat /sys/class/remoteproc/remoteproc0/state
running
root@radxa-dragon-q6a:~# cat /sys/class/remoteproc/remoteproc1/state
running
Where we stand
At this point we have a reproducible Yocto build producing a bootable image for the Radxa Dragon Q6A with mainline Linux 7.0, Gigabit Ethernet, SSH access, GPU, video encode/decode, and both DSP subsystems running — all from a single kas build command. WiFi and Bluetooth remain outstanding — the Quectel FCU760K module uses an AIC8800 USB chipset with out-of-tree drivers that still need packaging. The full source is available on GitLab — clone it, run the build, and you should have a flashable image within a couple of hours. Qualcomm’s upstream Linux support has come a long way — having the device tree merged in mainline and a working UEFI boot path made this significantly easier than it would have been two years ago. That said, expect to spend time on firmware path quirks, distro-level defaults that don’t match your board, and peripheral drivers that aren’t quite there yet. That’s board bring-up.
Learning
A few months ago, I’d have found this kind of project intimidating. Michael’s Yocto course changed that — I now feel ready to take on Yocto-based work, both professionally and for fun.