

Here are steps to reproduce it by yourself, if you are the happy owner of this board, currently priced at 48 EUR on the Arduino shop for the 2 GB version. This is done without removing the original kernel. Your board will still boot such kernel by default.
Setup and prerequisites
To do this by yourself, you will need:
- An Arduino Q board
- A USB-C hub with external power, to power the board and to connect external devices such as USB mass storage or USB-Ethernet.
- A USB-serial dongle supporting 1.8V operation.
🛑 Most devices of this kind are using 3.3V or 5V… you’re likely to damage the main processor if you apply excess voltage to it. I’m using the DSD Tech SH-USB-U09C2 USB to TTL adapter. - A USB stick
- A PC with GNU/Linux to compile the Linux kernel
The rest of this tutorial also assumes the board is flashed with its official Debian distribution image. See Flashing a New Image to the UNO Q if you need to restore such an image. It also assumes you can access the board’s serial console (look for Hardware Debug UART on the Debian guide).
Cross-compiling the Linux kernel
You will need just a few development packages on your PC to cross-compile Linux to the ARM64 architecture. Here we assume that you have a Debian-based Linux distribution:
$ sudo apt install git build-essential llvm clang lld libssl-dev libncurses-devIf you need anything else, just look for the missing packages, for example using packages.debian.org.
You can then clone the Linux kernel sources:
$ git clone https://git.kernel.org/pub/scm/linux/kernel/git/torvalds/linux.git
$ cd linux
$ git checkout v7.0
Before configuring and compiling the kernel, you need to set a target CPU architecture and compiler:
$ export ARCH=arm64
$ export LLVM=1
You can now configure the Linux kernel for your board:
$ make defconfig
$ make nconfig
In the nconfig interface:
- In
Platform selection, only keepQualcomm Platformsselected. - Look for
CONFIG_DRM(graphics support) andCONFIG_BT(Bluetooth), and disable them. Otherwise, we will be missing Qualcomm specific firmware that are not installed (yet).
You can then compile the kernel for your board. Here, we assume that your PC has 8 cores / 16 threads:
$ make -j 16Let’s also build an archive of the kernel modules, to deploy them on the local storage:is out, and already
$ make modules-cpio-pkgCopy the build artifacts to the board
Here, we assume that you have plugged in a USB key on your computer, mounted on /media/user/usbkey.
Let’s copy the generated files:
$ cp arch/arm64/boot/Image /media/user/usbkey
$ cp arch/arm64/boot/dts/qcom/qrb2210-rb1.dtb /media/user/usbkey
$ cp modules-7.0.0-arm64.cpio /media/user/usbkey
Then, on the serial console for your board, log in as the arduino user.
Connect your USB key to the USB hub powering the board. Let’s assume it appears as /dev/sdc1 on the board (run cat /proc/partitions to find out).
Then we can mount the USB key and copy its contents:
$ sudo su -
$ mkdir /mnt/sdc1
$ mount /dev/sdc1 /mnt/sdc1
$ cp /mnt/sdc1/Image /boot
$ cp /mnt/sdc1/qrb2210-rb1.dtb /boot
$ cd /lib/modules
$ cpio -idv < /mnt/sdc1/modules-7.0.0-arm64.cpio
$ mv lib/modules/7.0.0 .
$ rm -rf lib
$ reboot
Note that we can’t extract the contents of the modules archive directly from the root directory (/). For reasons I haven’t understood yet, it will corrupt your C library and render your system unusable.
Boot the board with Linux 7.0
Still in the serial console, right after reboot, press the space key until you get in the U-Boot shell.
You can type commands to boot the board with your newly built kernel instead of the default one:
setenv bootargs root=/dev/mmcblk0p68 rootwait
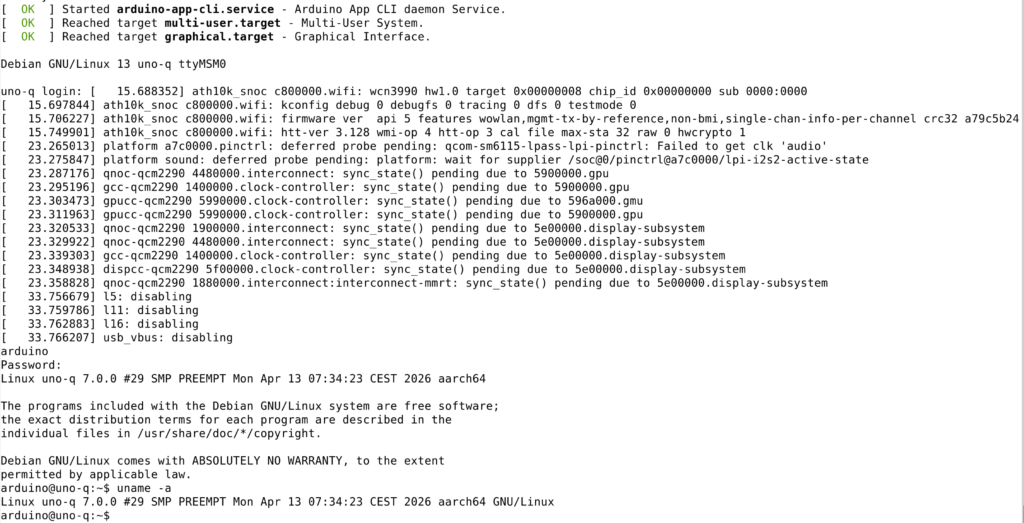
load mmc 0:44 11ac00000 boot/Image; load mmc 0:44 10a200000 boot/qrb2210-rb1.dtb; booti 11ac00000 - 10a200000There you are, the board should boot all the way to the usual login shell:
69 partitions!
Fun fact, the way the Qualcomm processor boots is expecting many partitions on the storage, for a total of 69 partitions with the usual system ones:
arduino@uno-q:~$ cat /proc/partitions
major minor  #blocks  name

 179        0   30535680 mmcblk0
 179        1       3584 mmcblk0p1
 179        2       3584 mmcblk0p2
 179        3        128 mmcblk0p3
 179        4        128 mmcblk0p4
 179        5       4096 mmcblk0p5
 179        6       4096 mmcblk0p6
 179        7        512 mmcblk0p7
 179        8        512 mmcblk0p8
 179        9        512 mmcblk0p9
 179       10        512 mmcblk0p10
 179       11       4096 mmcblk0p11
 179       12       4096 mmcblk0p12
 179       13       8192 mmcblk0p13
 179       14       8192 mmcblk0p14
 179       15       1024 mmcblk0p15
 179       16       1024 mmcblk0p16
 179       17          4 mmcblk0p17
 179       18        512 mmcblk0p18
 179       19        512 mmcblk0p19
 179       20       4096 mmcblk0p20
 179       21       4096 mmcblk0p21
 179       22      32768 mmcblk0p22
 179       23      32768 mmcblk0p23
 179       24       1024 mmcblk0p24
 179       25       1024 mmcblk0p25
 179       26       1024 mmcblk0p26
 179       27       1024 mmcblk0p27
 179       28          8 mmcblk0p28
 179       29       2048 mmcblk0p29
 179       30       2048 mmcblk0p30
 179       31       2048 mmcblk0p31
 259        0       2048 mmcblk0p32
 259        1      32768 mmcblk0p33
 259        2       1024 mmcblk0p34
 259        3       1024 mmcblk0p35
 259        4        512 mmcblk0p36
 259        5        128 mmcblk0p37
 259        6        128 mmcblk0p38
 259        7        128 mmcblk0p39
 259        8        128 mmcblk0p40
 259        9         64 mmcblk0p41
 259       10         64 mmcblk0p42
 259       11        512 mmcblk0p43
 259       12     131072 mmcblk0p44
 259       13          4 mmcblk0p45
 259       14       1024 mmcblk0p46
 259       15        256 mmcblk0p47
 259       16       8192 mmcblk0p48
 259       17      33424 mmcblk0p49
 259       18          4 mmcblk0p50
 259       19       1024 mmcblk0p51
 259       20       8192 mmcblk0p52
 259       21       2048 mmcblk0p53
 259       22      65536 mmcblk0p54
 259       23        128 mmcblk0p55
 259       24         32 mmcblk0p56
 259       25         32 mmcblk0p57
 259       26         32 mmcblk0p58
 259       27         25 mmcblk0p59
 259       28        512 mmcblk0p60
 259       29       1024 mmcblk0p61
 259       30        512 mmcblk0p62
 259       31       2048 mmcblk0p63
 259       32       2048 mmcblk0p64
 259       33       2048 mmcblk0p65
 259       34        128 mmcblk0p66
 259       35     524288 mmcblk0p67
 259       36   10460284 mmcblk0p68
 259       37   19058387 mmcblk0p69
 179       32       4096 mmcblk0boot0
 179       33          4 mmcblk0boot0p1
 179       34          4 mmcblk0boot0p2
 179       35       4054 mmcblk0boot0p3
 179       64       4096 mmcblk0boot1
 179       65          2 mmcblk0boot1p1
 179       66       4060 mmcblk0boot1p2
I believed that the Nvidia SoCs were the most complicated ones 🤣
Learning how to do this for your own boards
Would you like to learn how to figure out such manipulations to boot the kernel of your choice on any supported hardware? That’s actually pretty easy when you understand how a Linux system boots and what its most important pieces are (fortunately, just a few are absolutely necessary.
If so, you may be interested in our Embedded Linux training course. Then, you’ll just need 1 or 2 hours, or sometimes just a few tens of minutes, to boot another board with you own kernel. See also our Linux Kernel, Board Support and Driver Development training course to support your own hardware.